Key Takeaways
- Start with simple projects such as painting, installing shelves, replacing hardware, and improving storage to build DIY confidence.
- Prepare carefully by measuring spaces, gathering the right tools, protecting work areas, and following product instructions.
- Focus on improvements that solve everyday problems, such as clutter, poor organisation, inadequate storage, or outdated finishes.
- Small outdoor upgrades, including garden beds, refreshed furniture, patio improvements, and solar lighting, can enhance usable living space.
- Basic energy-efficiency measures, such as sealing drafts and upgrading lighting, can improve comfort and reduce unnecessary energy use.
- Know your limits and avoid complex electrical, plumbing, structural, gas, or high-risk projects without appropriate professional expertise.
- Treat every project as an opportunity to develop practical skills, learn from mistakes, and gradually take on more challenging improvements.
Improving your home does not always require a major renovation, a large budget, or years of construction experience. Many projects can be completed by beginners with basic tools, careful planning, and a willingness to learn. From refreshing tired walls to improving storage, lighting, outdoor spaces, and everyday functionality, small upgrades can make a noticeable difference in how a home looks and feels.
The key is choosing projects that match your skill level and knowing when a task requires professional expertise. By starting with manageable improvements, homeowners can build confidence while gradually creating a more comfortable, attractive, and functional living environment.
What Should Beginners Consider Before Starting a DIY Project?
Before picking up a paintbrush or reaching for a drill, take time to assess the project, your available tools, and your own level of experience. A successful DIY improvement begins with realistic expectations rather than enthusiasm alone. Beginners should consider how much time the project will take, whether specialised equipment is required, and whether mistakes could cause costly damage. It is also important to distinguish cosmetic improvements from work involving electrical systems, plumbing, structural components, gas lines, or major roofing work. The safest approach is to start small, learn the fundamentals, and gradually take on more challenging tasks as your confidence and practical skills improve.
Start With the Right Project
The best first project is one that has a clear beginning and end. Painting a small room, installing shelves, replacing cabinet hardware, or creating a simple garden feature can provide valuable hands-on experience without exposing you to excessive risk.
Avoid starting with projects that involve complicated wiring, structural changes, extensive plumbing, or major demolition. These tasks can create safety hazards and may require permits or licensed professionals depending on local regulations.
Gather Your Basic Tools
You do not need a professional workshop to begin. A basic household toolkit can support many beginner projects.
Consider having:
- A tape measure for accurate measurements.
- A claw hammer for basic assembly and removal tasks.
- Screwdrivers in several common sizes.
- A cordless drill and suitable drill bits.
- A utility knife for cutting materials and packaging.
- A spirit level for ensuring shelves, frames, and fixtures are straight.
- Sandpaper or a sanding block for smoothing surfaces.
- Safety glasses and work gloves for basic protection.
Invest in quality tools gradually rather than buying everything at once. As your projects become more ambitious, you can add specialised equipment based on what you actually use.
Measure Twice, Cut Once
Accurate measurements can prevent wasted materials and frustrating mistakes. Before cutting timber, drilling holes, or ordering supplies, measure the available space carefully and write down the dimensions.
Check measurements at least twice, particularly when working with multiple pieces that need to fit together. A few extra minutes spent measuring can save hours of correction later.
Which Painting Projects are Easy Enough for Beginners?
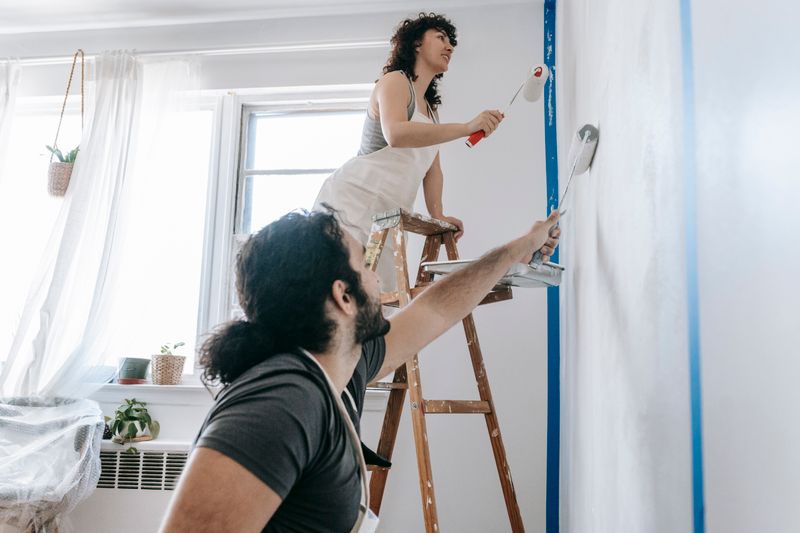
Painting is one of the most accessible ways to change the appearance of a home because it requires relatively few tools and can produce dramatic results. Even homeowners with little DIY experience can learn the basic techniques needed to achieve a clean finish. The important thing is to prepare the surface properly and avoid rushing between coats. Painting also provides an opportunity to learn useful skills such as filling holes, sanding, masking edges, protecting floors, and cleaning tools. Start with a manageable area rather than an entire house, and treat preparation as an essential part of the project rather than an unnecessary chore.
Refresh a Tired Room
A fresh coat of paint can make an old room feel cleaner, brighter, and more modern. Bedrooms, hallways, home offices, and smaller living spaces are particularly good candidates for beginner painting projects.
Remove furniture where possible and cover anything that remains in the room. Clean dusty surfaces, fill small holes, and lightly sand rough areas before applying paint. Use painter’s tape around trim and other surfaces where you want crisp edges.
For large walls, a roller will usually provide more consistent coverage than a brush. Use a brush for corners, edges, and detailed areas before rolling the larger sections.
Paint an Accent Wall
If painting an entire room feels overwhelming, start with one accent wall. This project allows you to experiment with colour while limiting the amount of preparation and painting required.
An accent wall can highlight a fireplace, bedhead, dining area, or architectural feature. Choose a colour that complements the existing furniture and finishes rather than selecting a shade in isolation.
Give Interior Doors a New Look
Painting interior doors can create a surprisingly noticeable improvement. White or neutral doors can be refreshed with a new coat, while a carefully chosen contrasting colour can make a doorway a decorative feature.
Remove the door hardware where practical and lightly sand the surface before painting. Apply thin, even coats rather than attempting to achieve complete coverage in one heavy application.
Update Small Decorative Areas
Beginners can also use leftover paint for smaller projects such as:
- Refreshing window trim.
- Painting a tired piece of furniture.
- Updating a wooden picture frame.
- Creating a simple geometric feature.
- Giving an old planter a new finish.
These projects use fewer materials and provide a low-pressure way to practise painting techniques.
How Can You Improve Storage Without Building Cabinets?
Storage problems are common in homes, but solving them does not always require expensive custom cabinetry. Simple shelving, hooks, organisers, and repurposed furniture can make everyday spaces significantly easier to use. Storage improvements are also excellent beginner projects because they teach fundamental DIY skills such as measuring, drilling, levelling, fastening, and assembling components. Before installing anything, consider what you need to store and how frequently you access it. The goal is not simply to add more storage but to create systems that make the home more organised and convenient. Thoughtful placement can make even small areas work harder.
Install Floating Shelves
Floating shelves can add useful storage to kitchens, bathrooms, bedrooms, offices, and living areas. They can hold books, decorative objects, toiletries, small plants, or frequently used household items.
The most important part of shelf installation is attaching the brackets or mounting hardware securely. Identify the appropriate wall structure before drilling, and use anchors designed for the type of wall you have.
Always check the manufacturer’s weight recommendations. A shelf that looks securely mounted may still fail if it is overloaded.
Add Wall Hooks
Hooks are among the simplest ways to improve organisation. Install them near entryways for bags and coats, inside cupboards for cleaning tools, or in bathrooms for towels.
A row of hooks can turn an otherwise unused section of wall into practical storage. Measure the spacing before installation so the finished arrangement looks intentional.
Upgrade Cupboard Storage
You can also improve existing cupboards without replacing them. Add small organisers, adjustable shelves, drawer dividers, pull-out baskets, or adhesive storage solutions.
These improvements can be especially useful in kitchens where awkward corners and deep cupboards often result in wasted space.
Repurpose Existing Furniture
Before purchasing new storage, look around your home for furniture that could serve another purpose. A small bookcase can become a pantry organiser, while a sturdy side table may work as additional bathroom or entryway storage.
Repurposing can reduce waste while giving old furniture a practical second life.
What Small Hardware Updates Can Make a Big Difference?
Replacing small hardware is one of the easiest ways to refresh a kitchen, bathroom, bedroom, or entryway without changing the underlying structure. Cabinet handles, drawer pulls, door hardware, hooks, and other fittings can become worn or visually dated even when the furniture itself remains in good condition. Because these upgrades typically involve removing existing hardware and installing replacements, they are approachable for beginners. They also provide an opportunity to practise using a screwdriver, measuring hole spacing, and aligning fittings. Although each change may seem minor, repeating the same improvement throughout a room can create a more cohesive and updated appearance.
Replace Cabinet Handles and Pulls
Old cabinet hardware can make otherwise attractive cabinetry look dated. Replacing it with a modern style can provide an immediate visual refresh.
Before buying replacements, measure the distance between existing screw holes. Cabinet pulls are available in different sizes, so selecting the wrong spacing may leave you with additional holes to repair.
Keep the original hardware in a labelled container in case you ever want to restore the cabinets to their previous appearance.
Update Drawer Hardware
Drawers can receive the same treatment. Choose hardware that complements the room’s existing finishes and make sure the new pieces are appropriately sized for the drawer fronts.
For new installations where holes do not already exist, create a simple cardboard template. This can help you maintain consistent positioning across multiple drawers.
Replace Basic Hooks and Towel Bars
Bathrooms, utility rooms, and entryways can benefit from updated hooks and bars. When replacing wall-mounted items, use appropriate anchors and check that the mounting surface can support the expected load.
A small level can help ensure that multiple fixtures are aligned properly.
Change Switch Plates and Outlet Covers
Replacing worn or discoloured switch plates can provide a quick cosmetic refresh. Turn off power where appropriate and follow safe procedures when working around electrical components. If a project involves modifying wiring or electrical connections rather than simply replacing a cover, consult a qualified electrician.
Which Outdoor Projects Are Suitable for First-Time DIYers?
Outdoor areas offer plenty of opportunities for beginner-friendly improvements, particularly when the project focuses on appearance, organisation, or simple functionality rather than structural construction. Improving a garden, patio, balcony, or entry area can extend the usefulness of your home while creating a more enjoyable place to spend time. Start by looking at neglected areas that could benefit from cleaning, planting, painting, lighting, or organisation. Outdoor projects also encourage homeowners to think about how spaces are used throughout the day. A few carefully selected changes can make a plain exterior feel more welcoming without requiring a complete landscape redesign or expensive construction.
Create a Simple Garden Bed
A basic garden bed can be created with relatively simple materials and tools. Choose a location based on sunlight, drainage, and accessibility.
You can define the area with timber edging, stone, bricks, or other suitable landscaping materials. Fill it with appropriate soil and choose plants that suit the local growing conditions.
Keep the first garden modest in size. A smaller, well-maintained bed is usually more rewarding than a large area that becomes difficult to manage.
Refresh Outdoor Furniture
Weathered outdoor furniture can often be revived rather than replaced. Clean the furniture thoroughly and assess whether it needs sanding, repainting, staining, or protective treatment.
Always check that the material is suitable for the product you plan to use. Wood, metal, plastic, and composite materials may require different preparation and finishes.
Improve a Patio or Balcony
A plain outdoor area can become more inviting through simple additions such as an outdoor rug, planters, seating, cushions, or decorative screens.
Arrange furniture around how you want to use the space. For example, a small table and chairs can create a dining area, while comfortable seating can establish a dedicated relaxation zone.
Add Simple Solar Lighting
Solar-powered garden lights can improve outdoor ambience without requiring complicated electrical installation. Place them along pathways, near planting beds, or around seating areas where they can receive adequate sunlight.
Lighting should support the way you use the outdoor area rather than simply filling every available space with lights.
How Can You Improve Your Home’s Energy Efficiency Yourself?
Energy efficiency improvements can range from very simple maintenance tasks to more involved upgrades. Beginners should focus first on projects that are inexpensive, low-risk, and easy to complete correctly. Sealing obvious drafts, improving window coverings, maintaining ventilation areas, and using efficient lighting can contribute to a more comfortable home while potentially reducing unnecessary energy use. However, homeowners should avoid treating every energy-related project as a DIY task. Work involving electrical systems, major insulation changes, gas appliances, or heating and cooling equipment may require professional assessment. Start with straightforward improvements that address visible sources of heat loss or inefficient everyday use.
Seal Small Drafts
Drafts around doors and windows can make rooms feel uncomfortable. Inspect areas where you can feel moving air and look for worn seals or obvious gaps.
Weatherstripping can be installed around suitable doors and windows, while caulk can help address certain stationary gaps. Follow product instructions carefully and make sure you are not blocking necessary ventilation.
Improve Window Coverings
Curtains and blinds can influence comfort by reducing direct sunlight or helping rooms retain warmth. Choose window treatments appropriate for the room and climate.
Blackout curtains may be useful in bedrooms, while lighter coverings can work well in rooms where you want to preserve natural daylight.
Switch to Efficient Lighting
Replacing old bulbs with efficient LED alternatives is a straightforward improvement. LEDs generally use less electricity than traditional incandescent bulbs and are available in different brightness levels and colour temperatures.
Think about how each room is used when choosing bulbs. Warm light can create a relaxed atmosphere in living spaces, while brighter neutral light may be useful for work areas.
Keep Vents and Fixtures Clear
Simple maintenance can also support efficient operation. Keep air vents, filters, and accessible fixtures clean according to the manufacturer’s recommendations.
Do not remove protective covers or attempt to modify heating, cooling, or electrical systems unless you have the necessary expertise.
These relatively simple actions can form part of broader budget-friendly home improvements when homeowners are looking for practical ways to improve comfort without undertaking a major renovation.
Which DIY Projects Can Make Your Home More Functional?
The most satisfying home improvements are often the ones that solve everyday frustrations. A loose towel rail, cluttered entryway, poorly organised cables, awkward storage area, or inconvenient workspace may not seem important individually, but small problems can affect how comfortable a home feels every day. Functional improvements are particularly suitable for beginners because they encourage you to observe how your household actually uses each space. Instead of choosing projects simply because they look attractive online, identify problems first and then find straightforward solutions. This approach can produce improvements that are practical, affordable, and much more valuable over the long term.
Create an Entryway Drop Zone
If bags, shoes, keys, and jackets regularly accumulate near your entrance, create a dedicated drop zone.
A small bench, shoe rack, wall hooks, and a tray for keys can provide an organised landing area. Even a narrow section of wall can become useful when each item has a designated place.
Build a Simple Home Office Setup
A dedicated workspace does not necessarily require custom cabinetry. A suitable desk, comfortable chair, shelf, task light, and cable organiser may be enough.
Position the desk where you have adequate lighting and enough room to work comfortably. Keep frequently used items within easy reach while storing less-used supplies elsewhere.
Organise Cables
Visible cables can make a room look cluttered and can become difficult to manage. Cable clips, sleeves, and under-desk organisers can help keep cords grouped and out of the way.
Label chargers and cables if several similar ones are used in the same location. This small organisational improvement can save time later.
Fix Minor Squeaks and Loose Fittings
Small maintenance tasks can also be worthwhile DIY projects. Tighten loose handles, hinges, knobs, and accessible screws where appropriate.
For squeaky hinges, a suitable lubricant may help. If a fitting continues to loosen or appears damaged, investigate the underlying problem rather than repeatedly tightening it.
What Should You Avoid as a Beginner?
Knowing what not to do is just as important as knowing which projects to attempt. DIY can save money and build useful skills, but an unsuitable project can quickly become expensive or dangerous. Beginners should be especially cautious when a task involves structural integrity, electrical wiring, gas systems, significant plumbing, hazardous materials, or major work at height. A project may look simple in a tutorial while requiring experience that is difficult to convey through a short video. When safety or building regulations are involved, professional guidance is often the smarter choice. Good DIY is not about doing everything yourself; it is about knowing where your abilities end.
Avoid Major Electrical Work
Replacing a decorative cover is very different from modifying electrical wiring. Electrical work can result in shock, fire, equipment damage, or other serious hazards if performed incorrectly.
If the task involves changing wiring, adding circuits, moving outlets, or troubleshooting significant electrical faults, use a qualified professional.
Be Careful With Plumbing
Replacing a simple fixture may be manageable for some experienced homeowners, but plumbing problems can quickly cause water damage.
If you are unsure about shut-off valves, pipe connections, hidden plumbing, or the cause of a leak, professional assistance can prevent a small issue from becoming a major repair.
Do Not Experiment With Structural Changes
Removing walls, altering load-bearing components, changing roof structures, or modifying foundations should not be treated as beginner DIY.
Structural changes can affect the safety and stability of an entire property. Obtain appropriate professional advice before making any alteration that could affect the building’s structure.
Avoid Dangerous Work at Height
Roof work, tall ladders, elevated platforms, and unstable surfaces introduce significant risks. A seemingly simple task may not be worth the potential injury.
Whenever a job requires substantial work at height, consider hiring someone with the appropriate equipment, training, and insurance.
How Can You Make Every DIY Project Go More Smoothly?
Good preparation is often what separates an enjoyable DIY project from a frustrating one. Beginners can dramatically improve their results by planning the sequence of work, purchasing materials before starting, protecting nearby surfaces, and allowing sufficient drying or curing time. It is tempting to begin immediately after watching a tutorial, but preparation can reveal problems before they become expensive. Take photographs of existing conditions, keep product instructions nearby, and organise your tools before starting. Most importantly, give yourself permission to work slowly. DIY is a learning process, and careful work is usually more successful than rushed work.
Make a Simple Project Plan
Write down the steps before beginning. A basic plan might include measuring, purchasing materials, preparing the area, completing the work, cleaning up, and inspecting the finished result.
If the project involves several stages, allow additional time for drying, curing, or setting between steps.
Calculate Materials Carefully
Estimate how much paint, timber, hardware, soil, or other materials you need. Buying too little can interrupt the project, while excessive purchases can create unnecessary expense.
Keep packaging and receipts where practical in case unopened materials need to be returned.
Protect Your Workspace
Cover floors and nearby furniture before painting, sanding, drilling, or assembling materials. Use dust protection when appropriate and maintain adequate ventilation when working with products that produce fumes.
A clean workspace also reduces the likelihood of losing tools or creating avoidable accidents.
Follow Product Instructions
Manufacturers provide instructions for a reason. Adhesives, paints, sealants, fasteners, tools, and other materials may have specific preparation and application requirements.
Do not assume that two similar-looking products can be used in exactly the same way.
Know When to Stop
If you encounter something unexpected, pause rather than improvising. Hidden pipes, wiring, structural problems, mould, significant water damage, or unfamiliar materials can change the nature of a project.
Taking a break to research the issue or consult a professional is often far better than trying to push through uncertainty.
How Can You Build Confidence With DIY Home Improvements?
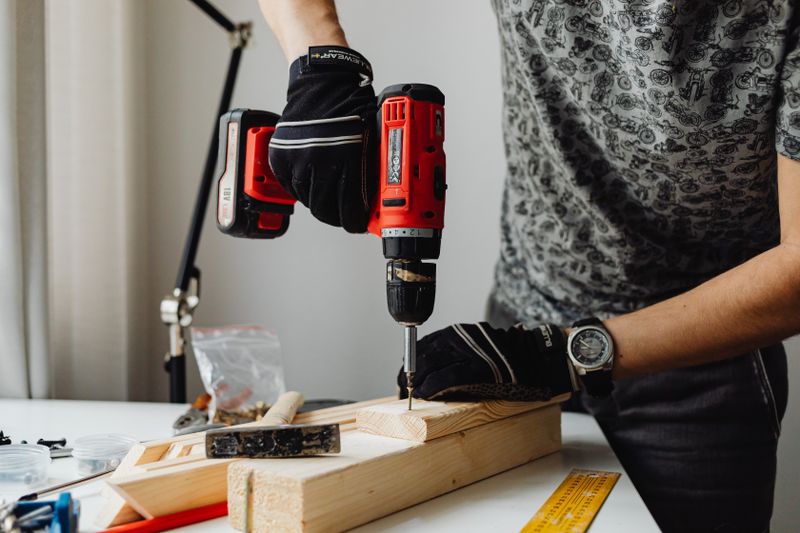
Building DIY confidence takes time, and homeowners should expect their first projects to be learning experiences rather than perfect demonstrations of craftsmanship. Start with improvements where mistakes are relatively easy to correct, such as painting, hardware replacement, basic organisation, and simple decorative projects. As you learn how different materials behave and become more comfortable using tools, you can gradually progress to more involved tasks. The goal is not to become an expert overnight. Instead, develop good habits around preparation, measurement, safety, and quality control. Every successfully completed project gives you practical knowledge that can make the next one easier.
Keep a Record of Your Projects
Take photographs before and after each improvement. Record the paint colours, product names, dimensions, hardware sizes, and other useful information.
This information can be valuable when you need to repair, replace, or expand something later.
Learn From Mistakes
Small mistakes are normal. You might apply too much paint, drill a hole in the wrong position, measure incorrectly, or discover that a material does not behave as expected.
Instead of becoming discouraged, identify what caused the problem. Understanding the mistake makes it less likely that you will repeat it.
Increase Difficulty Gradually
Once you are comfortable with simple projects, move toward tasks that involve several basic skills. For example, after learning to measure and drill, you might install a more complex shelving system.
Progress should be based on competence rather than ambition. A project is appropriate when you understand the tools, materials, risks, and expected outcome.
Use Reliable Learning Resources
Tutorials, manufacturer instructions, workshops, books, and experienced DIYers can all help you learn. Look for resources that explain not only how to complete a task but also why particular methods are recommended.
Be especially cautious with advice that ignores safety requirements or suggests shortcuts for potentially hazardous work.
Frequently Asked Questions About DIY Home Improvements
DIY projects can make home maintenance and improvement more approachable, but beginners often have questions about cost, difficulty, tools, and safety. Understanding the basics before starting can help homeowners choose projects that are realistic for their experience level. The following questions address some of the most common concerns and can serve as a starting point when deciding which improvement to tackle first. Remember that homes differ in construction, materials, age, and condition, so a technique that works for one property may not be suitable for another. When a project involves significant risk or uncertainty, professional advice remains the safest option.
What is the easiest DIY home improvement project?
Painting a small room, replacing cabinet hardware, installing simple hooks, or organising an existing storage area are among the easiest starting points. These projects require relatively basic tools and can usually be completed without changing the home’s structure.
How much should a beginner spend on DIY projects?
There is no universal amount because project costs vary considerably. Start with projects that fit comfortably within your household budget and avoid buying expensive tools until you know you will use them regularly.
Borrowing or renting specialised equipment can sometimes be more practical than purchasing it for a single project.
Should I buy power tools as a beginner?
A cordless drill is one of the most versatile power tools for basic household projects, but you do not need a large collection immediately.
Start with essential hand tools and add power tools as your skills and project requirements develop. Learn how to use each tool safely before beginning a project.
How do I know whether a project is too difficult?
Consider the tools required, potential consequences of mistakes, materials involved, and whether the work affects structural, electrical, plumbing, gas, or other critical systems.
If you cannot clearly explain how the project will be completed safely, it may be better to research further or consult a professional.
Can DIY projects actually improve a home’s value?
Some improvements can make a home more appealing to potential buyers, particularly when they improve appearance, functionality, maintenance, or overall condition. However, not every DIY project provides a financial return.
Focus first on improvements that make the home more comfortable and functional for the people living there.
Is DIY always cheaper than hiring a professional?
Not necessarily. DIY can reduce labour costs, but materials, tools, mistakes, repairs, and time can add up. Professional work may also provide greater reliability for complex or specialised projects.
The best approach is to compare the total cost, difficulty, risk, and expected quality before deciding whether to do the work yourself.
Conclusion
Beginner-friendly DIY projects can be an effective way to make a home more comfortable, functional, and attractive without immediately committing to a major renovation. Simple improvements such as painting, upgrading hardware, adding storage, refreshing outdoor areas, improving organisation, and addressing minor maintenance issues can deliver meaningful results.
The most important part of successful DIY is knowing your limits. Start with projects that match your experience, prepare thoroughly, use the right tools, and prioritise safety at every stage. As your skills develop, you can gradually take on more ambitious improvements while learning what tasks are better handled by qualified professionals.
With patience and thoughtful planning, even small projects can help create a home that works better for everyday life.